Pages

Saturday, June 25, 2011

SS Online Crop Challenge!

 ScrapbookSteals has an online crop challenge going on! I thought I would share my creations for it :)
Challenge #1: MWM # 48 which is posted  two posts before this one
Challenge #2: Number Recipe: 1 die cut, 3 colors of spray mist (or inks), 5 patterned papers, 7 brads and 9 buttons
Challenge #3: is to use this image as an inspiration piece and create a layout however it inspires you.
Challenge #4:is to create a layout for either a boy or a girl using products that are of the opposite gender
 Challenge #5: Bonus Sketch

I combined a few of the challenges but here they are!
Challenges #2 & #5
Bonus Sketch
Here is my page! I used Glimmer mist in 3 colours (Rum Punch, Pearl, and Creme de Chocloat) And the brown paper behind the photos has a subtle pattern on it. I think the rest is self explanatory!

Challenge #4 (& MWM #1)

 The page is pretty plain, but I like it!


I am not sure if I will get time to do challenge #3 before the Monday deadline, but I already have plans for it, so it will be done at some point!
Thanks for the challenges, girls! I've had fun!

Thursday, June 23, 2011

MWM #36

 Here is the sketch for MWM #36

And here is my page.
This page turned out completely different than I had planned. Completely. It has lots of empty space, but I am happy with how it looks!

Wednesday, June 22, 2011

MWM #48

Here is the sketch for MWM #48

And here is my page.

When I look through my album, I can't believe how many layouts I have done already. It is so much fun and I hope that it will be something my family will appreciate and use (look at?) in the future!

Father's Day Cards

Here are the Father's Day cards that I made.

Thanks for stopping by!

Thursday, June 16, 2011

MWM #47

 Here is the sketch for MWM #47

 And here are my pages. I had fun working with this line and this sketch!

Wednesday, June 15, 2011

Personalize a Towel - Tutorial

I love to personalize things. In this post I will show you how I personalized the hooded baby towel that I made here. I put the baby's first initial on the bottom corner of the towel.

Step 1:
Choose your fabric. Decide how big you want the letter or shape to be and cut out a square of fabric just bigger than you want your letter or shape to be. Cut out a square of fusible interfacing (I used Heat n Bond Lite) the same size as your fabric square and iron it to the back of your fabric. I used my Silhouette machine to cut out the baby's first initial, but this can easily be done by hand also. If you are doing it by hand, I would cut the shape out of paper first and then use that as a pattern to cut the fabric.

Step 2:
Iron the shape onto the towel where you want it. I put it in the bottom corner, but it would be cute on the hood or on the back too!

Step 3:
Stitch around the edge of the shape, there is no need to pin it on if you used interfacing. I kept my stitching in from the edge just a little so the edges will curl and fray a little when it is washed. I really like the way that looks.


Tuesday, June 14, 2011

Hooded Baby Towel Tutorial

When my daughter was born, my aunt made a hooded bath towel for her. It's a full size bath towel so it was big enough to wrap her in as a baby, and is still big enough to cover all of her at 2 years old! I absolutely love it and now that she's older, my daughter loves it too! I made her a few more so she always has a clean one to use after her bath.


I have started making them as baby shower gifts, and everyone says they love them too. I have had a few people ask me how to make them, so here are the step-by-step instructions with lots of pictures!
This is my first tutorial, so please leave me some feedback as to whether or not it makes any sense!

Step 1:
Buy a bath towel and matching/coordinating hand towel. (the hand towel will make 2 hoods, so you may want to buy two bath towels so you don't waste the other half of the hand towel.)
Here are the towels I am using.

Step 2:
Spread out your hand towel and cut off one end. I cut 7 inches off, this is a good sized hood for 1 year olds and up. You can make it whatever size you need, but don't make it too small or the baby will outgrow it really fast. Big kids may need it to be a few inches bigger.

Step 3:
Decide which is the "wrong" side and which is the "right" side. If you look at the finished ends of the towel, one side is usually sewn under, that is what I consider the wrong side.
This picture is of the towel wrong side up.

Once you have decided, fold the hand towel in half so the wrong sides are together. You will sew the cut edges together.

Step 4:
Once your hand towel is folded in half, sew the cut edges together. Sew very close to the edge, making sure you are sewing just far enough in that the stitches won't come out if the towel frays a little.

Step 5:
If your stitches are more than 1/4" from the edge, trim away the excess fabric, again being careful not to get too close to the seam.

Turn the hood inside out. 

Sew along the same seam, but from the other side this time. This will enclose the frayed edge.

Step 6:
Turn the hood right-side out again. Find the middle of one of the long edges of your bath towel. Pin the middle of the hood (where the seam is) to the middle of the long edge of the towel with the right side of the hood to the wrong side of the towel. I like them to overlap about 1/2". Finish pinning the rest of the hood on.

Sew along the very bottom of the hood. If the towel is very thick, be careful as you sew over the ends and the middle seam as your machine may have a little bit of trouble in those areas.

Step 7:
Turn the towel over and sew along the top edge of the towel just where the hood is.

That's it! Your hooded towel is finished. Now go find a cute little person to give it to, they will love it!
If you would like instructions and ideas on how to personalize your towel, check back tomorrow!
ETA: Here is the link to the personalization tutorial.

Monday, June 13, 2011

MWM #44

Here is the sketch for MWM #44


 And here's my page. Please excuse the shadowy corners!


I stuck pretty close to the sketch for this one because I really liked it! It was great to have all the space for journalling the details of the party!
Thanks Kristy!

Friday, June 10, 2011

MWM #46

Here is the sketch for MWM #46


And here is my page.
 Another fun one to do! My album is filling up pretty fast!

Monday, June 06, 2011

MCM #36

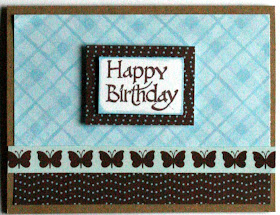
I really enjoy having the weekly MCM sketches, but this week there wasn't one. We were just asked to take our inspiration from one of the cards that Kristy from SS had posted. I liked this challenge a lot too!
Here are my cards that I made.

I think I need to invest in a few more birthday stamps! I've been using this one on everything lately!

MWM #43

Here is the sketch for MWM #43


And here is my page. I struggled a lot with this page (for 3 days!) but I do like the way it turned out.

Thanks for another great sketch, Kristy!
And thanks to all of you who gave me suggestions to help me finish the page!

Saturday, June 04, 2011

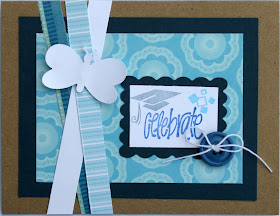
Graduation Cards & MCM #35

My brother graduated from High School this weekend. It's going to be so strange to see him go off to University, but I know he will do great!
Here are two cards I made for him.
 The Cougar is the High School's logo that I traced & cut with my Silhouette. It is cut from flocked heat transfer material and ironed onto the card.

 I also made some cards for the Young Women that I teach at church who are graduating. I used the MCM #35 sketch for them.
Here is the sketch

 And here are my cards

The butterflies have glimmer mist on them to add some sparkle :) I hope the girls like them!

Friday, June 03, 2011

MWM #41

Here is the sketch for MWM #41

I took my inspiration from the second page, but changed it a little to fit my pictures that I had.
Thanks to Sheryl for a great sketch, it's definitely one I want to use again when I have more pictures and can use both pages!

Thursday, June 02, 2011

MWM #8

I've just been going through the MWM sketches and doing them as I have time and suitable pictures.
Here is the sketch for MWM #8
And here is my page.
I've been wanting to scrap this photo for a while but didn't have any papers that worked. Then I remembered I had my Imaginisce Christmas paper stashed away with my other holiday stuff. I dug it out and it worked perfectly!

MWM #45

This weeks sketch definitely challenged me. I loved doing it, but it was for sure out of my comfort zone!
Here's the sketch

And here's my page

Thanks for a great sketch, Lisa!